Merry Christmas!


Blessed Christmas from Magnificat

 
Dear Friends,

We wish you a very Merry and Blessed Christmas!
May this Christmas be a time of special joy and grace for you and all your family.

We would like to share with you the following "Blessing on Christmas Presents"
that you might like to pray with your family and loved ones.

Asking God's blessing for you and your dear ones, we assure you of our prayers,
and thank you for being a faithful member of the MAGNIFICAT family. 

Sincerely in Christ, 

MAGNIFICAT 

Litany of Christmas Thanks

Response: Baby Jesus, we thank you.

For the Blessed Virgin Mary your Mother who said "Yes" to the angel. R/

For John the Baptist who leapt in the womb of Elizabeth his mother when you visited him in Mary. R/

For Joseph your foster father who trusted the angel instead of heeding his own doubts. R/

For the donkey that carried your expectant Mother to Bethlehem. R/

For the neighbor who led your holy family to the stable. R/

For the manger in which you were placed as if in the first tabernacle. R/

For the animals who were there in the first moments that you were adored. R/

For the angels and their song that led shepherds to your stable. R/

For the shepherds who worshiped you and then proclaimed the Good News like priests. R/

For Simeon who all his life had been waiting for you in the temple, longing to hold you. R/

For Anna the prophetess who proclaimed you to all those looking for deliverance and peace. R/

For the star that led the Magi to your manger and your Mother. R/
   

Loving Father,
 all of these Christmas gifts
 symbolize how much you love us
with the supreme Gift of your Son, Jesus Christ,
born for us this Christmas day.
 We give these gifts to one another to express
 how grateful we are for your unfathomable generosity
 and to show how eager we are to share that goodness with one another.
Bless these tokens of love and caring.
Never let us get attached to material things,
but rather let the joy flowing from these presents
 strengthen our bonds of love, deepen our relationships,
and move us to be more thankful, selfless, and giving all the days of our life.
Thank you for the birth of Jesus,
 our brother and our Savior.

Glory be to the Father, and to the Son,
and to the Holy Spirit, as it was in the beginning,
is now and will be forever.
Amen.*


*Adapted from Blessing Prayers: Devotions for Growing in Faith
by Fr. Peter John Cameron, O.P.


For more information, visit www.magnificat.com

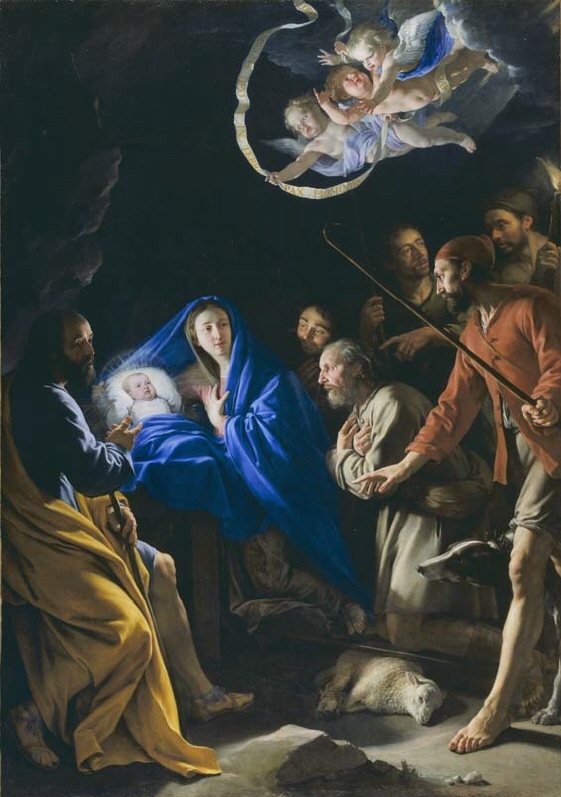
The image at top is The Adoration of the Shepherds by Philippe de Champaigne (1602-1674), Wallace Collection, London. © The Wallace Collection, dist. RMN/The Trustees of the Wallace Collection.

My Red Heart Rant

Red Heart Super Saver yarn is affordable. That's the only nice thing I can say about it.

Free Owl Ear Flap Hat Pattern

I posted this on Ravelry so I certainly should post it here--a free crochet pattern. Since I can't post it directly to my blog, you have to get it at google docs. Just click on the link

Simple Way to Make a Pom Pom

I was indecisive about whether I should include pom pom instructions with my hat patterns that call for a pom pom. Actually, I didn't really want to go to the trouble of writing it out and taking photos. AND I reasoned that there are tons of instructions about pom pom making all over the internet--just go look. But I finally decided that if my hat calls for a pom pom I should tell you how to make one. So here we go:

Trace circle onto cardboard or plastic and cut out. If you want a 2” pom pom, the area you wrap needs to be 1” wide. I trace around a jar or glass for the outer circle and a bottle cap or something similar for the smaller circle.


Cut circle in half and then cut out inner circle
 
Cut 12 inch length of yarn and insert between the two half circles. I stuff the extra yarn between the cardboard so it’s out of my way while I’m winding the yarn around the cardboard.
 
Wrap yarn evenly around cardboard, going back and forth from one end to the other. The more yarn you use, the fuller your pom pom will be.
 
Tighten yarn around pom pom before cutting yarn.
 
Slip tip of scissors between cardboard and cut yarn. I hold it flat on the table to keep the yarn from slipping out while I cut.
 

Tighten yarn around pom pom, wrap around at least twice if possible.


Fluff pompom, trim ends.


Parliament of Owls

Sometimes an idea in your head doesn't easily translate to a pattern. I think the orange owl is spaced out on drugs.
 The blue owl with earflaps is okay but it's pretty much like every other owl hat pattern that's available.


I'm pretty happy with this one, but opinions in my household are not as enthusiastic.

They're all going into the incubator until I get some other input.

Sold!

I'm so excited because I just sold my first pattern for the reindeer hat! I love making patterns but boy are they time consuming. I don't know how many hours I spent on that pattern, but I'm going to have to sell a lot of them to make minimum wage. LoL

Right now I'm working on an owl hat, even though there are tons of owl hat patterns out there, my job is to make it cuter than the rest of them.

I have a box full of hats that I just need to write up the patterns and post them. Like I said, time consuming. When I started this I didn't think I would enjoy it so much--and without web sites like Etsy and Ravelry, it wouldn't have been possible.

Adorable reindeer

Still writing up the instructions, I hope to have the pattern available on Etsy tomorrow.

Designing a hat

I'm trying to design a child's reindeer hat. I didn't think it would be so time consuming trying to get it to look the way I want and then translate it into a pattern that other people will understand. And then, after you have all if it figured out, you have to write it up in multiple sizes.

I think it's looking pretty cute right now. I had to remake the antlers three times before I was able to get them to work. The first antler I attached was too long and heavy and wouldn't stand up straight, this one is a little shorter. It isn't attached to the hat yet, but I think it will stand up better after I put a little fiberfill inside. I still have to figure out what I want the eyes to look like. Some people use buttons, but I hesitate to use them on a child's hat because of the choking hazard.

Do you know that female reindeer have antlers, too? That should give you a hint that I after I get this one finished, I'm going to make a little girl version--probably in pink.

Dream Weaver becomes Rug Weaver

When my Grandma Seater moved to assisted living, I was given her old rug loom. I don't know the
history behind it as far as when she acquired it or what she did with the rugs she made. The loom sat in her basement for many, many years, dirty, dusty, musty. I wasn't even sure I wanted the old thing when it was offered to me. Not to mention, I didn't know anything about weaving.

Once it was in my possession, I went to work learning all that I could about weaving rag rugs. But before I could make my first rug I had a lot of work to do. 


Mainly, I had to strip the old varnish off of the wood, sand it, and rub it down with 
tung oil. Of course all of the metal parts were rusty so that required even more work. Luckily, someone told me about a spray-on rust cutter which saved me a lot of time.


At this point I'm wondering what I've gotten myself into and if I'm going to remember how to put everything back together.


Fortunately I found a person online who sent me
photos of her loom. I don't know how I would have gotten it together without those photos.

I haven't made many rugs, though. It has a few mechanical issues that I'm unable to resolve, either because the parts are worn or missing.

It will be staying in that spot forever since I can't move it through the doorway unless I take it apart.


One of my first rugs in progress.

Unconventional Photo Studio

Do you know what is the worst part of having an Etsy store? For me, it's taking great photos. There have been days where I spent the whole day trying to get a few decent shots to post in my shop. Incandescent bulbs, shade, fluorescent lights, I've tried them all and it wasn't until I set up my equipment in the greenhouse that I was able to get good photos consistently.

Does it look cold out there? Yesterday the temperature was in the high twenties, but with the sun shining, it was very pleasant---spring-like I'd say.


Kind of messy looking inside isn't it? I suppose I should have straightened it up a bit before I took the photo!
 
Here's a photo of my setup, using household items for staging my products. I bought a bed sheet for two bucks from Goodwill to drape over a cardboard box. Sometimes I use knickknacks in my photos just because I get tired of the plain white background that most people use in their Etsy photos. I use the tan bed sheet that's hanging from the ceiling to block the sun when it's shining, but I take the best photos on cloudy days.

Welcome

I love needlecrafts and now I have a place to share my love with all who take an interest. Welcome to my Garden of Colorful Stitches!